Original ways of tying shoelaces on sneakers is a hot topic for any fashion blog, because today sneakers are the most trendy shoes of our time. Why confine yourself to the boring “criss-cross” option if lace-up sneakers can be turned into a creative process! Being able to tie laces on sneakers beautifully, it turns out every day to look in a new way, effortlessly complementing your image with a bright touch, creating original patterns on shoes in different colors and textures.
Material Content:
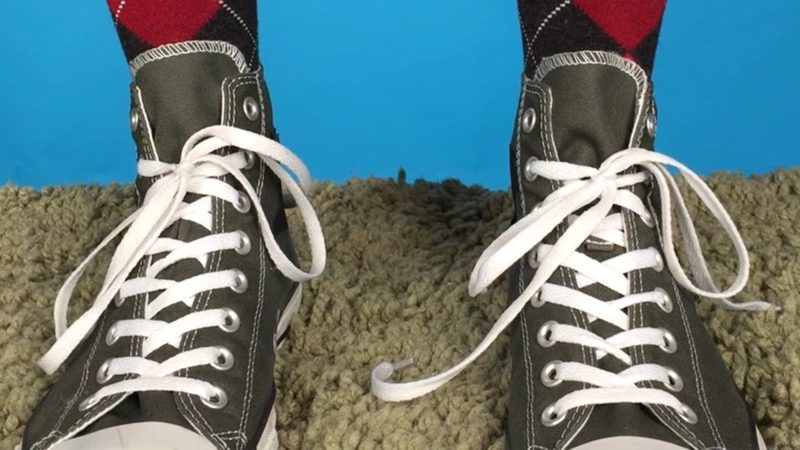
The classic way to lace up sneakers
Perhaps, each person will call “classical” the option that he was taught in childhood, and he used it for many years. Meanwhile, you can perform such a lacing in different ways.
Traditional
Functional and universal option, suitable for any sneakers, the tongue tissue does not wrinkle, and he, with proper fixation, does not slide to one side:
- Pass the lace through the lower eyelets of the shoe. Leaving the ends out, we distribute them so that the length on both sides is equal.
- We cross the laces, we pass the ends through the following holes, again moving from the inside.
- Repeat the steps until all the holes are involved.
- We fix the ends in any convenient way, be it a bow or a kind of knot.
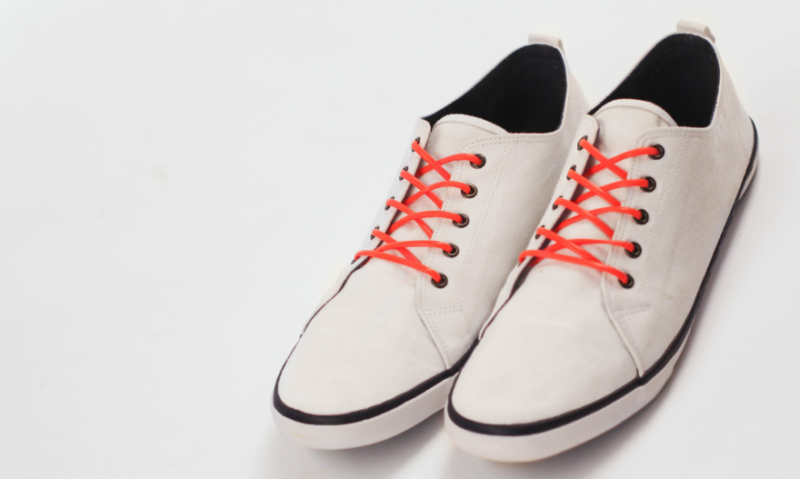
Straight
Fits any number of eyelets, is easy to perform, looks simple and stylish at the same time:
- We start from the bottom holes. Pass the lace into them from the outside, align the length. The ends should be inside. Then we move both laces in their row: left - on the left, right, respectively, on the right.
- Pass the left end into the next eyelet, from the inside out. The right one is passed in its own row in an identical way, but through one hole.
- Then the left end must be transferred to the next row, into a hole strictly parallel to the one in which it is currently located. We pass it from top to bottom.
- Repeat the steps similar to the third step with the right lace - i.e., we translate it horizontally from the right row to the left, into a parallel hole. At this point, the shoelaces should form 3 straight lines.
- Then we repeat the steps from the second step in the same sequence until there are free eyelets. We fix the ends at our discretion - on a bow or knot.
Popular tying patterns for 4, 5, and 6 holes
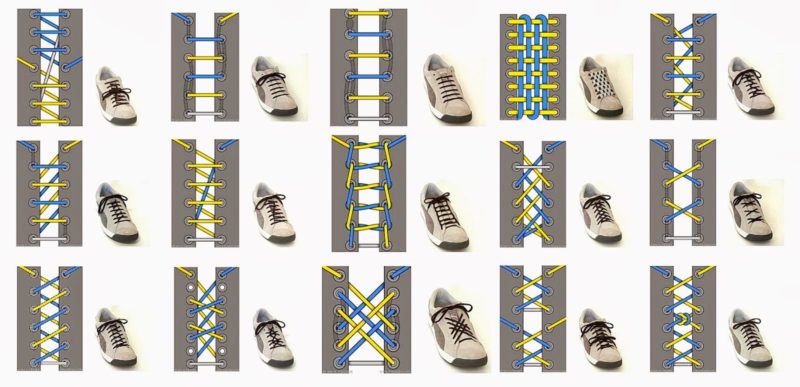
In addition to the classical methods that are appropriate under any conditions, the ability to apply more interesting lacing options is also useful. Consider the most common schemes designed for different numbers of holes.
Important! The number of metal eyelets for the lace on the shoe is considered to be on the one hand.
If your “snickers” have only 8 holes, 4 on each side, then it is the last digit that should appear when looking for a suitable lacing option.
4 hole circuits
Consider the two most interesting lacing patterns.
Diagonal:
- We pass the lace through the lower rings: one end passes from the inside (it is visible), and the second from the outside (invisible).
- Align the length.
- We pass the visible end from the outside into the next cringle on the opposite row.
- With the "invisible" end we do the same, only move from the inside. At this point, he will be outside the shoe.
- Repeat steps 3 and 4 until we get to the upper ringlets of shoes. It remains only to tighten the edges of the lace.
Square:
- The ends of the lace are passed into the lower rings, moving from the outside to the inside. The length of both sides of the rope should match. The output will be a beautiful horizontal line.
- We pass the left side into the next hole in a parallel row. This time we move from the inside out.
- We do the same with the right side: we pass it into the next hole in the left row, bringing the end out of the shoe.
- Then on the same side we move from the second ringlet to the third, forming a short straight line. The lace will be threaded from the outside to the inside. Repeat the manipulations with the right row.
- Repeat steps 2 and 3, tighten the ends of the lacing.
5-hole options
Now we find out what options exist for 5 holes.
Node:
- We pass the lace through the lower holes, the ends move in the external direction. Align the length.
- We cross the left and right halves, twisting them for each other (we get a kind of nodule), then we pass the ends into the second eyelets from the opposite side.Each time, the lace should be inserted from the inside, and the nodes made from the outside.
- Repeat the manipulations for all 5 holes. At the exit, the ends will be on the outer sides of the shoe, it remains to tighten them with another, already fixing knot.
Lattice:
- In the first lower rings we pass the lace, immediately making its length the same on both sides.
- Cross the ends, push the left from the outside into the third right eyelet, and the right, respectively, into the third left.
- Each half of the lace on its side is returned to the second hole. We move from the inside, sticking the edges out.
- We repeat step 2, only this time the lattice will be formed by the movement of the lace from the second holes into the fifth. Fix the edges.
Please note that with this lacing scheme, which is considered the most popular for 5 holes, the fourth eyelets remain free.
6-hole lace-up methods
Consider lacing methods for 6 holes.
Checkers:
Important! For each shoe you will need two shoelaces of different colors, in the classic version - white and black. However, one can safely experiment with this.
- We fix the white lace at the base, and then we pass through all the grommets, forming 6 straight horizontal lines (here you can use the classic straight lacing).
- The edge of the black lace is also fixed at the base from the inside, then we extend it perpendicular to the white lines, passing it alternately above and below them. By analogy, we make 4 black rows. The second edge is also fixed and carefully hidden under the tongue.
Cross Staircase:
- We thread the lace into the lower eyelets from the inside, the ends are brought out.
- We put them into the second holes in a row, each on its own side. First we move inward, and then we pull the ends of the lace up towards the opposite row.
- We interlace them in the form of an elegant loop and thread into the third rings (the ends of the lace have changed sides).
- We repeat the pattern to six holes, after which we fix the lace with a bow.
The result is a beautiful, attention-grabbing knit that is somewhat reminiscent of a suspended staircase in which the "steps" are intertwined with simple loops.
Original types of weaving
To creatively lace up sneakers, it is not necessary to spend a lot of time and disassemble complex patterns, it is enough to take two pairs of bright shoelaces, carefully sew their edges and then weave them together in a favorite way, for example, in the same classic way.
And if you have a couple of minutes of extra time and a great desire to stand out from the crowd, use the following simple techniques.
Roman lacing
Ideal for 6 grommets, at the output we get the original alternation of laces, similar to Roman numerals - X-I-X-I:
- We launch one edge of the lace into the lower left ring (the second remains just to hang, later it will be needed to fix the node), rise vertically and bring it out of the second hole.There is a clear order: in the first cringle we launch the lace through the top, and in the next we bring it out already from the inside. Then again, run through the top, etc.
- Then we move into the third hole in the right row, and from it we pass by the hidden inner line to the fifth in the same row.
- Next will be the sixth cringle in the left lane, then the fifth in it.
- From there we return to the sixth hole of the right row, from it along the inside of the shoe we go to the fourth.
- Then there will also be a 4th cringle, but already on the left row, in the end we will get a straight line (Roman unit).
- We go down to the third hole, and then to the second in the right row and, finally, we bring the edge of the lace out through the first ringlet.
- We tie two edges in a knot on the side so that it can be hidden inside the shoe.
Changeling
We take two pairs of colored shoelaces, playing in contrast. It is better to choose thin and flat options. Then you need to stack them on top of each other and lace up using any of the proposed schemes. Even the simplest “drawing” will look in a new way - creative and bright due to the fact that colors will harmoniously replace each other.
How to lace up without bows
In fact, there are a myriad of such lacing options, we are actively using many of them without even thinking that there is no bow as such. Some of them were mentioned above, for example, Roman, checkers, direct. Consider another traditional way of tying shoelaces without a bow.
Display:
- We hang the end of the lace into the lower eyelet and pull it out with a zigzag in the opposite row one hole above.
- We repeat all the manipulations until the lace reaches the last hole at the top.
- We perform all the same actions, only now we move from top to bottom, filling all the holes that remained empty.
- We simply hide the lace under the tongue of the shoe.
To find "your" technique that allows you to beautifully tie the laces on sneakers, it is worth trying out different ideas. In any case, be guided by the rule that lacing today is not only the possibility of tight fixation of shoes on the foot, but also a good way for self-expression.


